A parking pay station only performs as well as its installation allows. The best hardware from the best manufacturer will frustrate drivers and drain your maintenance budget if it sits in the wrong spot, runs on unreliable power, or lacks adequate network connectivity. Installation planning is not glamorous work, but it is the foundation that determines whether a pay station operates reliably for a decade or becomes a recurring headache within months.
This guide walks through the practical considerations every operator and installer should address before the first bolt goes into concrete.
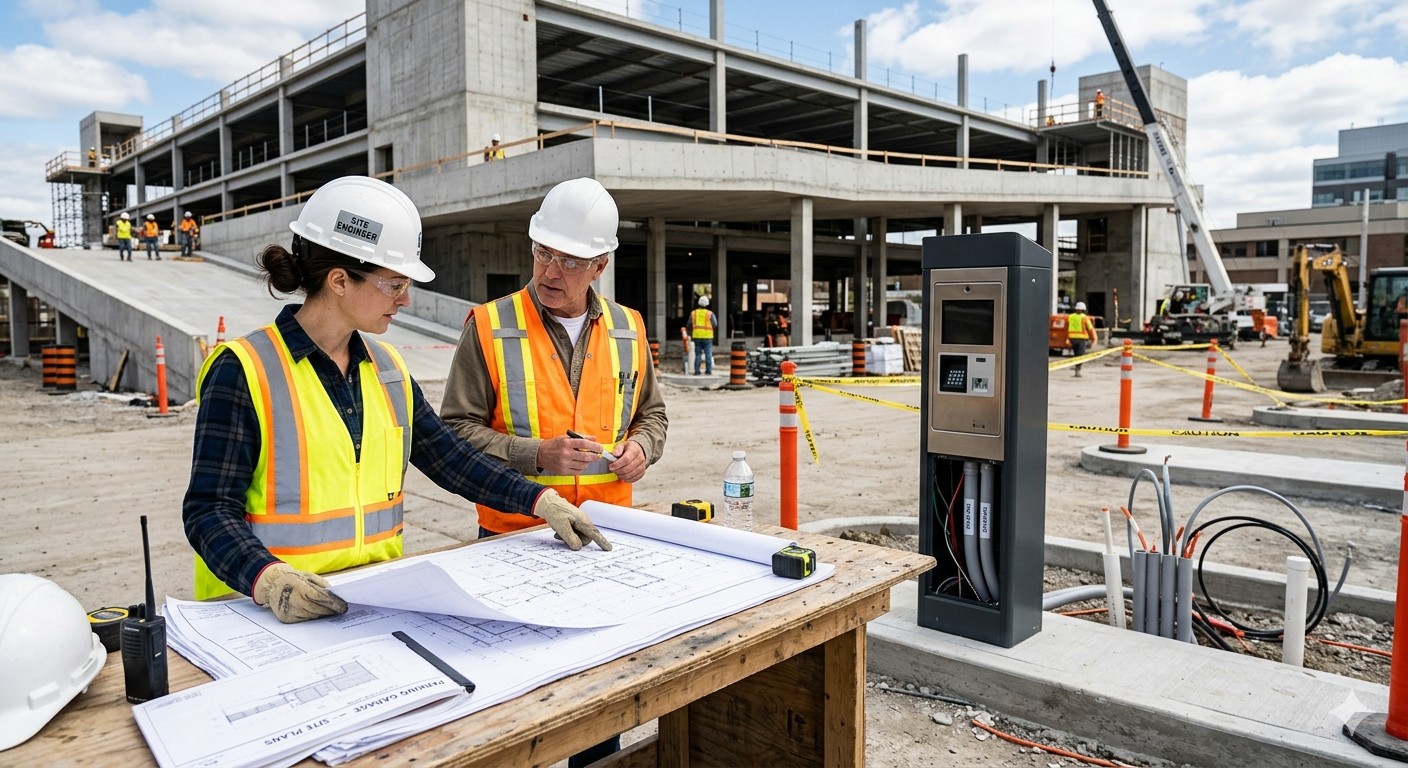
Site Assessment: Where to Begin
Before selecting mounting locations or pulling electrical permits, conduct a thorough site assessment. This applies whether you are outfitting a new construction project or retrofitting pay stations into an existing lot or garage.
What the Site Assessment Should Cover
- Traffic flow patterns — Where do vehicles enter, circulate, and exit? Where do pedestrians walk between their cars and the destination?
- Existing infrastructure — Locate electrical panels, conduit runs, data cabling, barrier gates, loop detectors, and any legacy equipment being replaced.
- Line of sight — Can drivers see the pay station from the entry lane? Can pedestrians find it easily from elevator lobbies or stairwells?
- Environmental exposure — Note sun angles (screen glare), prevailing wind direction (rain and snow intrusion), and drainage patterns (standing water).
- ADA and accessibility — Identify accessible routes, curb cuts, and existing accessible parking spaces.
- Vandalism and security risk — Assess lighting levels, camera coverage, and whether the station will be in a high-traffic or isolated area.
A site assessment typically takes two to four hours for a surface lot and a full day for a multi-level garage. Bring a tape measure, a camera, and the electrical panel schedule.
Placement Strategy
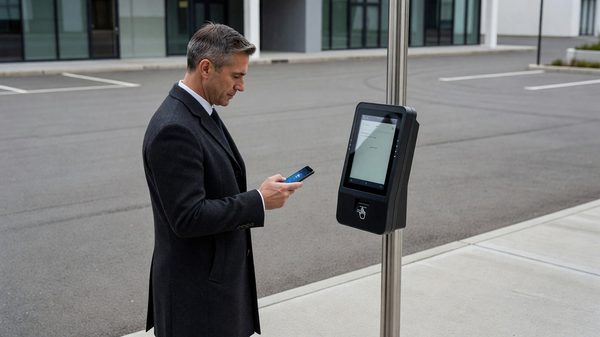
Where you position a pay station directly affects revenue collection efficiency, user experience, and maintenance costs. The two primary models are lane-based placement and centralized placement.
Lane-Based vs. Centralized Placement
| Factor | Lane-Based (Entry/Exit) | Centralized (Pay-on-Foot) |
|---|---|---|
| Location | In or beside vehicle lanes | Pedestrian areas near elevators or exits |
| User interaction | Driver pays from vehicle window | Pedestrian walks to station before returning to car |
| Transaction speed | Must be fast — vehicles queue behind | More time allowed — no traffic backup |
| Weather exposure | Full outdoor exposure | Often semi-sheltered in garages |
| ADA considerations | Drive-up height requirements | Full pedestrian accessibility required |
| Number of devices | One per controlled lane | Fewer units serve more spaces |
| Typical application | Gated surface lots, airport exits | Parking garages, hospitals, universities |
Most facilities use a combination. A gated garage might have ticket dispensers or LPR cameras at entry, centralized pay-on-foot stations inside the garage, and a final verification device at exit. Understanding the role each station plays in the transaction flow is critical to getting placement right.
Placement Best Practices
- Minimize walking distance. For pay-on-foot stations, place devices within 30 meters (roughly 100 feet) of the primary pedestrian path between parking and the destination.
- Provide redundancy. Install at least two pay stations per pedestrian exit zone. If one goes down for maintenance, the other keeps revenue flowing.
- Avoid blind corners. Drivers approaching a lane-based station need at least 15 meters of clear sight distance to read signage and prepare payment.
- Consider queue space. Lane-based stations need enough stacking room behind them that a vehicle waiting to pay does not block circulation aisles.
- Face away from direct sunlight when possible. Southern and western exposure causes screen glare and accelerates enclosure heating. If unavoidable, specify a high-brightness display and a sun hood.
For help choosing the right hardware before you plan placement, our pay station comparison guide covers the key differences between device types.
Electrical Requirements
Pay stations require reliable, clean power. Most modern units operate on standard single-phase electrical service, but the specifics vary by manufacturer and configuration.
Typical Electrical Specifications
| Parameter | Common Range |
|---|---|
| Input voltage | 100-240 VAC (universal) or 120 VAC (North America) |
| Current draw | 2-6 amps typical, 10-15 amps peak (with heaters) |
| Circuit requirement | Dedicated 20-amp circuit per station recommended |
| Conduit | 1-inch rigid or flexible metallic conduit |
| Grounding | Equipment ground required; isolated ground recommended for sensitive electronics |
| Surge protection | UL-listed surge protector at the panel and/or at the device |
Power Planning Checklist
- Dedicated circuits. Never share a circuit between a pay station and other equipment (lighting, gate operators, cameras). Inrush current from compressors or motors on a shared circuit can cause pay station reboots.
- Heater loads. In cold climates, pay stations include enclosure heaters that cycle on at low temperatures. A station drawing 3 amps in summer may draw 12 amps on a January night in Minnesota. Size the circuit for worst-case.
- UPS or battery backup. For facilities where power interruptions are common, a small uninterruptible power supply (500-1000 VA) keeps the station operational during brief outages and protects against voltage sags.
- Conduit routing. Plan conduit paths before pouring concrete islands. Retrofitting conduit into an existing lot requires saw-cutting, which is expensive and disruptive. The National Electrical Code (NFPA 70) governs burial depth, conduit fill, and other requirements — ensure your electrician pulls the relevant permits.
Solar-Powered Options
On-street and remote surface lot installations sometimes use solar-powered pay stations to avoid the cost of trenching electrical conduit across a parking lot. Manufacturers like Flowbird, IPS Group, and Hectronic offer solar configurations. These work well in regions with adequate sunlight but require careful analysis of:
- Average daily solar insolation at the installation latitude
- Expected transaction volume (each transaction draws power for display, printer, and card reader)
- Winter performance (shorter days, snow accumulation on panels)
- Battery sizing for multi-day cloudy stretches
Solar stations typically cost $2,000 to $5,000 more than grid-connected equivalents but eliminate trenching costs that can exceed $10,000 in hardscape installations.
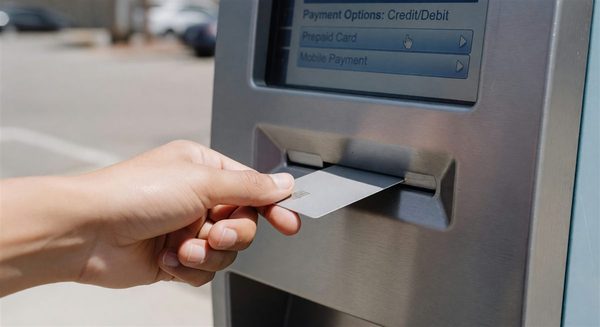
Network Connectivity
Every modern pay station needs a network connection for payment processing, remote management, and software updates. The three common options are cellular, wired Ethernet, and Wi-Fi.
Connectivity Comparison
| Connection Type | Pros | Cons | Best For |
|---|---|---|---|
| Cellular (4G/5G) | No wiring needed; works anywhere with coverage | Monthly data plan; latency varies; carrier dependency | Surface lots, on-street, remote sites |
| Wired Ethernet | Reliable, low latency, no recurring data cost | Requires conduit and cabling; expensive to retrofit | Garages with existing network infrastructure |
| Wi-Fi | Low recurring cost; no cabling to each device | Signal reliability in concrete garages is poor; security concerns | Indoor garages with strong Wi-Fi coverage |
Most installations default to cellular because it eliminates the need for network cabling. A single station might use 50-200 MB of data per month depending on transaction volume and whether it transmits images or video. Carriers like Verizon, AT&T, and T-Mobile offer IoT data plans starting around $10-15/month per device.
For garages with extensive existing network infrastructure, wired Ethernet provides the most reliable connection. Run Cat6 cable in the same conduit as power (in a separate compartment or conduit, per code) to reduce installation cost.
Foundation and Mounting
Pay stations are heavy — typically 150 to 400 kg (330 to 880 lbs) depending on whether they include cash-handling hardware. They need a solid, level mounting surface.
Mounting Options
- Concrete island or pad. The most common approach. A reinforced concrete pad at least 100 mm (4 inches) thick, poured to the manufacturer’s template, with anchor bolt sleeves cast in place.
- Bollard-style pedestal mount. Some compact pay stations mount on a steel pedestal that bolts to existing concrete. Useful for retrofits where pouring a new pad is impractical.
- Curb-mounted. On-street meters and smaller pay stations sometimes mount directly to an existing curb or sidewalk, anchored with expansion bolts.
Regardless of mounting method, ensure:
- The surface drains away from the station (2% minimum slope)
- Conduit penetrations are sealed against water intrusion
- The station is bolted with tamper-resistant hardware
- The base is at least 100 mm above the surrounding grade to prevent splash-up and standing water
ADA and Accessibility Compliance
Pay stations installed in the United States must comply with the Americans with Disabilities Act (ADA). The 2010 ADA Standards for Accessible Design specify requirements for operable parts, reach ranges, and approach clearances.
Key ADA Requirements for Pay Stations
- Forward approach clear floor space: 760 mm x 1220 mm (30 in x 48 in) minimum
- Side approach clear floor space: 760 mm x 1520 mm (30 in x 60 in) minimum
- Operable parts reach range: Between 380 mm and 1220 mm (15 in and 48 in) above the ground for a forward approach
- Operating force: No more than 22 N (5 lbs) for any operable part
- Accessible route: A firm, stable, slip-resistant path connecting the accessible parking space to the pay station
In practice, this means the card reader, bill slot, coin slot, touchscreen, and receipt dispenser must all fall within the reach range. Some manufacturers offer dual-height models or adjustable-tilt screens to meet these requirements without installing two separate devices.
For lane-based stations where the driver interacts from a vehicle, ADA requirements are different — the focus shifts to mounting height relative to the vehicle window and the ability to reach controls from the driver’s seat.
Signage and Wayfinding
Drivers who cannot find the pay station do not pay. Signage planning should happen alongside station placement.
Signage Recommendations
- Directional signs at every decision point — garage entry, stairwell exits, elevator lobbies — pointing toward pay stations
- Identification signs on or above each station, with the word “PAY HERE” in high-contrast text at least 75 mm (3 in) tall
- Instructions on the station itself, kept to five steps or fewer, with pictograms for multilingual clarity
- Payment method icons (credit card, contactless, mobile pay, cash) displayed prominently so users know their options before approaching
- Emergency contact information with a phone number for live assistance
Pre-Installation Checklist
Use this checklist before scheduling installation:
- Site assessment completed, including photos and measurements
- Placement locations marked and approved by facility management
- Electrical panel capacity confirmed; dedicated circuits available or ordered
- Conduit routing designed; permits filed with local authority
- Network connectivity plan finalized (cellular, Ethernet, or Wi-Fi)
- Concrete pads poured or mounting surfaces prepared to manufacturer specs
- ADA compliance reviewed; accessible routes confirmed
- Signage plan created and signs ordered
- Manufacturer installation documentation reviewed by installation crew
- Payment processor account activated and terminal IDs assigned
- PCI compliance validated — see our PCI compliance guide for details
- Post-installation testing plan prepared (every payment method, every lane, every time of day)
Common Installation Mistakes
Learning from others’ errors saves time and money. These are the most frequent issues installers and operators encounter:
1. Undersized Electrical Service
Operators who did not account for heater loads in winter find their pay stations tripping breakers on the coldest nights — exactly when the revenue loss hurts most.
2. Poor Drainage Around the Base
Water pooling at the base of a pay station accelerates corrosion, freezes in winter (blocking access doors), and creates slip hazards. Sloping the pad away from the device costs almost nothing during installation but is expensive to fix later.
3. No Redundancy
Installing a single pay station to serve a 500-space garage creates a catastrophic single point of failure. When that station goes down for maintenance, the garage either operates at a loss or requires emergency staffing.
4. Ignoring Sun Glare
A touchscreen facing west in Phoenix is unusable from 3 PM onward for half the year. Screen orientation should be evaluated during the site assessment — not after drivers start complaining.
5. Skipping the Network Test
Just because a cellular signal shows three bars on a smartphone does not mean the pay station’s embedded modem will maintain a stable data connection. Test the actual modem at the exact installation location before committing to a connectivity plan.
Working with Manufacturers and Integrators
Most pay station manufacturers — Scheidt & Bachmann, Skidata, Flowbird, Hectronic, T2 Systems — provide installation guides specific to their equipment. Some offer factory-certified installation services or can recommend regional integrators with experience installing their hardware.
When evaluating installation partners, ask for:
- References from comparable facilities (same size, same climate, same device model)
- Proof of electrical and general contractor licenses in your jurisdiction
- Experience with ADA compliance requirements for parking equipment
- A warranty that covers installation workmanship separately from the manufacturer’s equipment warranty
The International Parking & Mobility Institute maintains resources and training programs for parking technology installations that both operators and integrators find valuable.
Bottom Line
Pay station installation is a civil, electrical, and network engineering project wrapped in a parking operations decision. The hardware gets the attention, but the site work determines long-term success. Invest the time in a thorough site assessment, size electrical service for worst-case loads, plan for network reliability, and make sure every station is accessible, visible, and well-signed. The facilities that get installation right spend their time managing revenue. The ones that rush it spend their time managing problems.